How to Make Homemade Catnip Toys
There’s something magical about watching your cat lose their mind over a little pouch of catnip. Those zoomies, rolls, pounces, and blissful face rubs are pure entertainment. But you don’t have to rely on store-bought toys to get that reaction—making homemade catnip toys is easy, affordable, and a whole lot of fun.
Whether you’re a DIY enthusiast or simply want a personal touch for your feline friend, this guide will walk you through everything you need to know about making safe, engaging, and fun catnip toys at home.
Why Cats Love Catnip
Catnip, or Nepeta cataria, is a herb from the mint family that contains a compound called nepetalactone. This compound triggers a temporary behavioral response in about 70% of cats, including rolling, purring, meowing, or hyperactive play.
Catnip is completely safe for cats, non-addictive, and can be a great enrichment tool—especially for indoor cats who need extra stimulation.
Benefits of Making Your Own Catnip Toys
- Customizable: Choose the fabric, size, and shape that best fits your cat’s personality.
- Cost-Effective: Homemade toys are often cheaper than store-bought ones.
- Safe Ingredients: Control what goes inside—no toxic fillers or synthetic fabrics.
- Eco-Friendly: Repurpose old clothes or fabric scraps to reduce waste.
Essential Materials You’ll Need
Before diving into the DIY projects, let’s gather the basics. You likely have many of these items at home already.
- Dried catnip (organic preferred)
- Fabric scraps (cotton, fleece, or denim work well)
- Thread and needle or a sewing machine
- Scissors
- Stuffing (poly-fill, old socks, cotton balls)
- Optional: bells, feathers, yarn, felt, glue (pet-safe), or string
Always make sure the materials are non-toxic and do not shed easily, as loose threads or beads can become choking hazards.
1. Classic Catnip Pillow Toy
This is the easiest toy to start with and perfect for beginners.
Instructions:
- Cut two small rectangles (about 3×4 inches) from soft fabric.
- Sew three edges together, leaving one side open.
- Fill with a mix of dried catnip and stuffing.
- Sew the final edge shut securely.
Creative Twist: Add crinkle paper inside for sound stimulation or embroider your cat’s name on the fabric for a personalized touch.
2. Sock Catnip Toy
Old socks get a new life with this simple project.
Instructions:
- Take a clean sock (baby socks or ankle socks work best).
- Fill it halfway with dried catnip and a bit of poly-fill or cotton.
- Tie a knot at the open end.
Creative Twist: Braid the end with ribbons or add a jingle bell inside to make it more interactive.
3. Felt Fish Toy
These are visually appealing and great for gift-giving cat parents.
Instructions:
- Cut two identical fish shapes from felt.
- Sew around the edges, leaving a small opening.
- Stuff with catnip and fill.
- Close the opening tightly with hidden stitches.
Creative Twist: Use colorful felt and embroidery floss to decorate the fish with “scales” or add googly eyes (securely sewn or glued) for a fun effect.
4. Knotted Catnip Ball
For cats who love to chew, this toy is perfect.
Instructions:
- Cut a square piece of fabric (around 8×8 inches).
- Place a spoonful of catnip in the center.
- Gather the fabric into a pouch and tie it tightly with a string.
Creative Twist: Use multiple layers and tie in different spots to create a shape that mimics a mouse or ball of yarn.
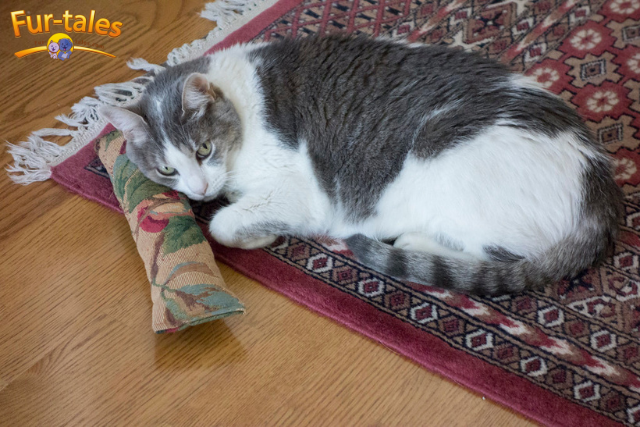
5. Catnip Kicker Toy
Great for kittens or active cats who love to bunny-kick.
Instructions:
- Cut two long rectangles (about 3×10 inches).
- Sew three edges and stuff with a generous amount of catnip and fill.
- Sew the last side shut.
Creative Twist: Attach feathers to one end and wrap it in denim to make it more durable.
Safety Tips for Homemade Catnip Toys
- Always supervise your cat the first time they use a new toy.
- Avoid small parts like buttons or beads that could be swallowed.
- Check for loose threads or holes regularly and repair them promptly.
- Replace the catnip inside every few weeks to maintain potency.
Storage Tips for Catnip Toys
Store unused catnip toys in an airtight container or zip-lock bag in the freezer or a cool, dark place. This helps preserve the potency of the catnip.
You can also rotate toys weekly. This keeps your cat interested and extends the life of the toys.
Eco-Friendly and Upcycled Ideas
DIY cat toys can also be environmentally friendly. Here are a few ideas:
- Use old baby clothes, worn-out t-shirts, or mismatched socks.
- Fill toys with dried herbs like valerian root or silvervine as alternatives to catnip.
- Avoid plastic fillers and opt for natural cotton or wool.
Homemade toys not only help reduce waste but also create a stronger bond between you and your pet, knowing you crafted something just for them.
Frequently Asked Questions
Q: Is catnip safe for all cats?
A: Yes, catnip is safe and non-toxic. However, not all cats react to it. Kittens under 6 months and some adult cats may show no interest.
Q: How long does catnip last in homemade toys?
A: Typically, the scent remains potent for about 1–3 weeks depending on usage. Refresh by storing in a catnip bag or adding a few drops of catnip oil.
Q: Can I wash catnip toys?
A: Washing may remove the scent. Instead, spot clean the fabric and replace the catnip if needed.
Q: What can I use if my cat doesn’t respond to catnip?
A: Try alternatives like silvervine, valerian root, or honeysuckle—many cats respond even more strongly to these.
Q: How much catnip should I use in a toy?
A: A tablespoon per toy is plenty. Too much might overstimulate some cats, so start with a moderate amount.
Image Source: https://www.flickr.com/photos/adavey/9729915268
